How to Cut a Wolf Cut at Home: DIY Step by Step Guide
Want the trendy, textured wolf cut without spending money at a salon? ✂️ With the right tools and a little patience, you can learn how to cut a wolf cut at home step by step. This DIY guide covers sectioning, layering, face-framing, and blending so you can create that signature volume and shaggy texture while avoiding common cutting mistakes.
Can You Cut a Wolf Cut at Home?
Yes, but the difficulty depends on your hair length, texture, density, and how dramatic you want the haircut to be.
| Hair type or situation | DIY difficulty |
| Medium straight hair | Moderate |
| Long straight hair | Moderate |
| Wavy hair | Moderate |
| Curly hair | Moderate to difficult |
| Thick hair | Difficult |
| Fine or thin hair | Moderate |
| Very short hair | Difficult |
| Damaged or heavily processed hair | Not recommended |
If this is your first attempt, start with less cutting than you think you need. You can always remove additional length later, but you cannot immediately replace hair that has already been cut.
What You Need for a DIY Wolf Cut
Before starting, gather your tools.
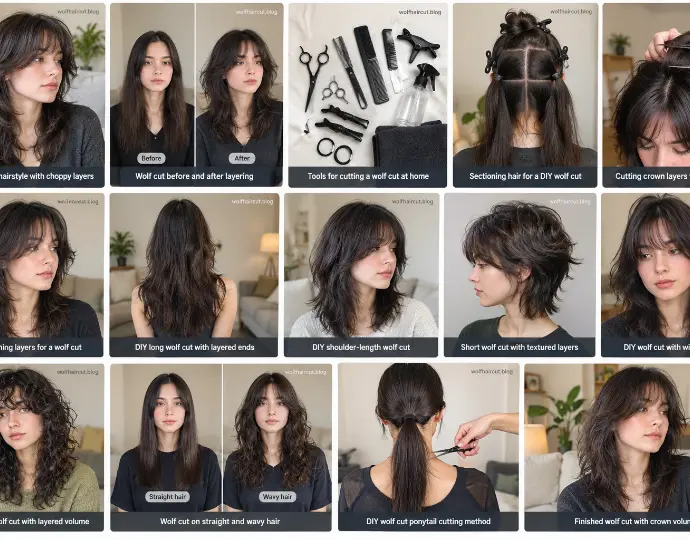
Essential tools
- Sharp hair-cutting scissors
- Fine-tooth or wide-tooth comb
- Sectioning clips
- Hair ties
- Spray bottle
- Large mirror
- Hand mirror
- Towel or haircutting cape
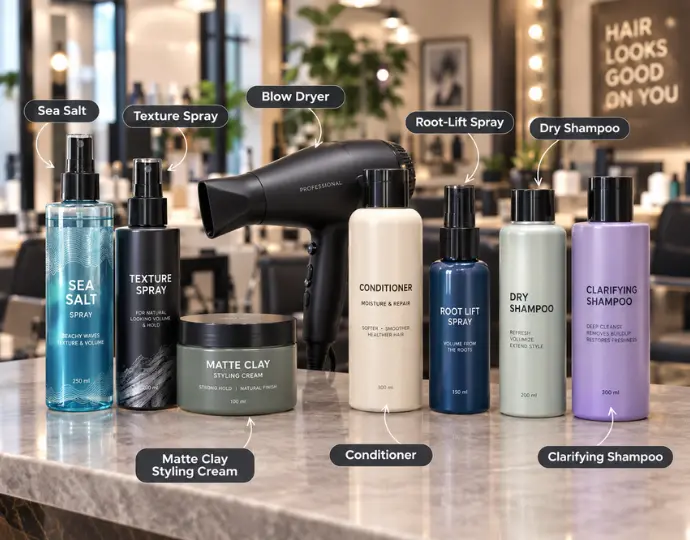
Optional styling tools
- Texturizing shears
- Blow dryer
- Round brush
- Diffuser
- Lightweight mousse
- Texturizing spray
- Curl cream for wavy or curly hair
Avoid using household scissors. Dull or unsuitable scissors can crush the hair instead of producing a clean cut.
Choose Your Wolf Cut Style
Before picking up the scissors, decide how dramatic you want the finished haircut to be.
Soft Wolf Cut
A soft wolf cut uses:
- Longer crown layers
- Gentle face framing
- Less contrast between the top and back
- Softer ends
This is a good choice if you want the wolf-cut shape without a very choppy appearance.
Classic Wolf Cut
A classic wolf cut has:
- Noticeable crown volume
- Medium-length layers
- Face-framing pieces
- A longer back
- Textured ends
This is the most versatile option for a DIY haircut.
Dramatic Wolf Cut
A dramatic version features:
- Shorter crown layers
- Stronger volume
- More noticeable face framing
- Greater contrast between the top and back
- Choppier texture
Beginners should be conservative with this version because taking too much length from the crown can be difficult to correct.
How to Section Hair for a DIY Wolf Cut
Good sectioning is one of the most important parts of the process.
Start by detangling your hair and creating a clean center part from the forehead to the nape.
Then divide the hair into manageable sections:
- Top/crown section
- Left side
- Right side
- Back section
- Nape/back length
Secure each section with clips.
The crown section controls much of the haircut’s overall shape. Keep the sections organized so you don’t accidentally cut hair that is supposed to remain part of the longer back.
Middle Part vs. Side Part
A center part makes the face-framing layers appear more balanced on both sides.
A side part can create a more asymmetrical, swept appearance and can change how the fringe and front layers fall.
If you’re unsure, start with your natural part rather than forcing a new one.
How to Cut a Wolf Cut at Home: Step by Step
Step 1: Prep & The “Three-Ponytail” Sectioning
The secret to a flawless DIY wolf cut is clean sectioning.
- The Action: Thoroughly brush dry hair to remove all tangles. Divide the top and front areas into three distinct sections using elastic hair ties to map out your upcoming layers.
- The Fringe: Create a triangular section right at the front of the forehead and tie it off so it hangs straight down over the face.
- The Sides: Part the remaining top hair down the center, and tie them into two high pigtails on the left and right sides of the crown.
Step 2: Establish the Lower Length Baseline
Before cutting the layers, you need to set your baseline length.
- The Action: Leave the lower back section of your hair down. Separate a thin horizontal slice of hair at the very nape of the neck and clip the rest of the back hair out of the way.
- The Cut: Comb this bottom section completely flat against the back. Use professional hair shears to trim the bottom edge evenly. This establishes the absolute maximum length of your haircut.
Step 3: Point-Cut the Main Back Layers
This step creates the iconic volume and effortless movement in the back.
- The Action: Release the remaining back section of your hair. Gather it all together and pull it straight up vertically toward the ceiling.
- The Cut: Hold the hair tightly between your fingers. Instead of cutting straight across, snip vertically into the hair ends (point-cutting). This prevents harsh lines and gives you soft, shaggy layers.
Step 4: Cut the Face-Framing Fringe
Time to create the bangs that pull the entire wolf cut aesthetic together.
- The Action: Release your front triangular ponytail over your face and comb it out smoothly.
- The Cut: Use a fine-tooth comb to guide your shears at eyebrow or bridge-of-the-nose level. Cut a clean, straight horizontal line across to create your heavy fringe.
Step 5: Slide-Cut to Blend the Sides
To avoid a disconnected look, you must blend your new bangs into your side lengths.
- The Action: Release the left and right high pigtails. Take a diagonal slice of hair that connects the outer edge of your new bangs down toward the longer side pieces.
- The Cut: Hold your shears pointing downward at an angle. Gently open and close the scissors while sliding them down the hair shaft (slide-cutting) to create a seamless, cascading frame around the face.
Step 6: Shake Out & Style for Maximum Volume
The final step brings the entire textured look to life!
- The Action: Remove all remaining hair ties and hair clips, then give your head a good shake to let the layers fall naturally.
- The Style: Grab a blow dryer and a round brush (or use your hands to ruff-dry the roots). Blow dry the hair forward and fluff up the crown area to maximize the piecey, high-volume texture of your brand-new wolf cut.
Tools Recommended For This Cut:
- Professional hair cutting shears (avoid regular household scissors)
- Fine-tooth sectioning comb
- 3–4 Creaseless hair elastics or sectioning clips
- Blow dryer and round brush for styling
DIY Wolf Cut for Different Hair Lengths
DIY Wolf Cut for Long Hair
Long hair gives you plenty of room to create the wolf-cut shape. A DIY wolf cut long hair approach works best when you keep the back long and build the crown layers slowly. If you’re looking for a long wolf cut DIY style, avoid cutting off too much length just to make the layers stand out.
Focus on:
- Preserving the back length
- Building the crown gradually
- Creating face-framing layers
- Removing bulk carefully
- Avoiding excessive thinning
If you want a long wolf cut, don’t sacrifice the length simply to make the layers more noticeable.
The contrast between the shorter crown and longer back is what creates much of the characteristic shape.
DIY Wolf Cut for Medium-Length Hair
Medium-length hair is often a practical starting point for a wolf cut. For a DIY wolf cut medium hair look, connect the crown to the sides gradually. Shoulder-length hair can also work well; a DIY wolf cut shoulder length hair style usually looks best when you keep enough length around the back and sides.
Create the crown layers gradually and maintain enough length in the back to preserve movement.
A medium wolf cut can be made soft or dramatic depending on how short the crown becomes.
DIY Wolf Cut for Short Hair
Short hair requires more planning because there is less length available for creating the characteristic contrast. If you’re trying a DIY short wolf cut, focus on texture and a soft shape instead of copying a long wolf cut. A short wolf cut DIY haircut or DIY wolf cut on short hair can be tricky to balance, so make tiny cuts and check the shape from every angle. This wolf cut tutorial short hair DIY approach is safest when you leave the nape and crown longer than you first planned.
Rather than trying to recreate a long wolf cut, focus on:
- Crown texture
- Face framing
- Layered sides
- Controlled volume
- A textured nape
If your hair is already very short, a professional stylist may be a better choice.
DIY Wolf Cut for Different Hair Types
Straight Hair
Straight hair makes the layers highly visible. For a DIY wolf cut straight hair style, work in neat sections because straight strands can show uneven lines quickly.
Use clean sectioning and check the haircut from multiple angles.
Because straight hair can show uneven lines easily, avoid making large cuts.
Light point cutting can help soften the finished ends.
Wavy Hair
Wavy hair can create natural movement in a wolf cut. A DIY wolf cut wavy hair style should follow your natural wave pattern, so avoid cutting too much while the hair is wet.
Remember that waves may make the hair appear shorter after drying.
Avoid cutting too much length while the hair is wet if you aren’t familiar with how your natural wave pattern behaves.
A lightweight styling product can help define the finished layers.
Curly Hair
Curly hair requires extra caution because shrinkage varies from curl to curl. If you’re planning a wolf cut DIY curly hair look, cut conservatively and check how each curl sits before removing more length.
The same amount of cutting can produce very different visible lengths.
Consider your natural curl pattern before cutting the crown or bangs.
For highly curly hair, a stylist experienced with your curl type can produce a more predictable result.
Coily Hair
Coily hair can work with a layered wolf-cut shape, but shrinkage, density, and curl pattern make precision especially important.
Work in smaller sections and avoid removing large amounts of hair at once.
Preserving enough density at the ends can help maintain a fuller shape.
Thick Hair
Thick hair can create excellent volume for a wolf cut.
However, don’t remove large amounts of bulk simply because the hair feels heavy.
Controlled layering is usually better than aggressively thinning the entire haircut.
Fine or Thin Hair
Fine hair can benefit from a softer wolf cut.
Avoid excessive texturizing because removing too much density can make the ends appear sparse.
Keep the layers controlled and preserve enough weight through the lower sections.
How to Cut Wolf Cut Bangs at Home
Bangs can completely change the appearance of a wolf cut, so cut them after establishing the main haircut. For a DIY wolf cut with bangs, decide whether you want curtain bangs, a wispy fringe, or longer face-framing pieces before you start.
Start longer than your desired final length.
Curtain Bangs
Curtain bangs can be blended into the face-framing layers.
Begin near the center and gradually increase the length toward the sides.
Wispy Fringe
For a softer fringe, keep the ends light and avoid creating a heavy horizontal line.
Wolf Cut Without Bangs
You don’t need bangs to have a wolf cut.
Long face-framing layers can create a softer version that is easier to maintain.
Bangs rule: Cut less than you think you need. Hair can always be shortened later.
Can You Do a Wolf Cut With the Ponytail Method?
The ponytail method is a popular quick DIY technique where the hair is gathered into one or more ponytails and trimmed to create layers. Many people search for a DIY wolf cut ponytail because it looks simple in short videos, but it can be harder to control than cutting in sections.
It can be convenient, but it offers less control than carefully sectioning the hair.
A ponytail cut can produce unexpected results because:
- Different sections may be pulled at different angles
- Hair texture can affect the final length
- The crown may become too short
- The back can lose more length than intended
- Face-framing layers aren’t easily controlled
If you want a predictable wolf-cut shape, individual sectioning and a controlled crown guide are safer than relying entirely on the ponytail method.
DIY Wolf Cut Before and After
A good wolf cut should create a visible difference in shape without making the hair look randomly chopped.
Before comparing your results, style the hair in the way you normally wear it.
Look for:
Before:
- Heavy or uniform shape
- Limited crown movement
- Minimal face framing
After:
- More crown volume
- Noticeable layered texture
- Face-framing movement
- Longer, flowing back
- More dynamic silhouette
Remember that the finished appearance can change significantly after washing and styling.
DIY Wolf Cut vs. Butterfly Cut
Wolf cuts and butterfly cuts both use layers, but their shapes are different.
| Wolf Cut | Butterfly Cut |
| Shaggier appearance | Softer, polished appearance |
| More textured | More blended |
| Strong crown texture | Flowing layers |
| Often longer through the back | More evenly distributed layers |
| Casual, tousled finish | Voluminous, polished finish |
If you want a deliberately messy, textured appearance, a wolf cut may be the better choice.
If you prefer smooth, flowing layers with a more polished finish, consider a butterfly cut.
Common DIY Wolf Cut Mistakes
Cutting Too Much at Once
Make small cuts and reassess.
Making the Crown Too Short
A crown that is cut excessively short can be difficult to blend with the longer sections.
Removing Too Much Back Length
The longer back is part of the wolf-cut silhouette. Preserve it unless you intentionally want a shorter version.
Over-Thinning the Hair
Texturizing should be controlled. Too much thinning can make the ends look weak.
Ignoring Natural Texture
Waves, curls, and coils can shrink considerably after drying.
Cutting the Bangs First
The bangs should complement the overall shape rather than determine it.
Chasing Perfect Symmetry
Natural hairstyles don’t always need mathematical symmetry. Focus on overall balance and movement.
Continuing to Correct Small Imperfections
If you keep cutting every section that looks slightly different, you may eventually remove much more length than planned.
How to Fix a Wolf Cut That Went Wrong
Don’t immediately grab the scissors again.
If the crown is too short
Allow it to grow instead of shortening the surrounding hair dramatically.
If the haircut looks like a mullet
The transition between the crown, sides, and back may be too disconnected. A professional stylist can blend the sections without sacrificing unnecessary length.
If one side looks shorter
Style both sides naturally first. Hair direction can make one side appear shorter.
If the ends look too thin
Stop thinning the hair and avoid removing additional length. Allow the ends to regain density as they grow.
If there is not enough volume
Try styling the roots before cutting more hair.
A blow dryer, lightweight mousse, or texturizing spray can create more volume without changing the haircut.
How to Style a DIY Wolf Cut
The right styling technique can make a major difference.
For Straight Hair
Apply a small amount of lightweight styling product and use a blow dryer to create movement around the crown and ends.
Avoid making every layer perfectly smooth.
For Wavy Hair
Use a lightweight mousse or wave-enhancing product.
Scrunch the hair and allow the natural texture to form.
For Curly Hair
Apply curl cream to damp hair and use a diffuser on low heat.
Avoid brushing the curls aggressively after drying.
For More Volume
Apply mousse near the roots and lift the crown while blow-drying.
For More Texture
Use a small amount of texturizing spray through the mid-lengths and ends.
The goal is movement rather than making the hair stiff.
How Often Should You Trim a Wolf Cut?
The maintenance schedule depends on how quickly your hair grows and how short your layers are.
A general maintenance window is around 5–8 weeks, although bangs and shorter crown layers may need attention sooner.
If you’re trying to grow a longer wolf cut, avoid frequent major reshaping.
Small maintenance trims are usually better than repeatedly changing the overall structure.
When You Should Not DIY a Wolf Cut
Consider seeing a professional if:
- You want a major length transformation
- Your hair is severely damaged
- Your hair is heavily chemically processed
- You have very short hair and want a complex wolf cut
- Your curl pattern is difficult to predict
- You need highly precise bangs
- You are uncomfortable cutting your own hair
- You have already made several uneven cuts
A stylist at Salon can assess your density, texture, face shape, and existing layers before creating the haircut.
DIY Wolf Cut vs. Salon Wolf Cut
| DIY Wolf Cut | Salon Wolf Cut |
| Little or no haircut cost | Professional service cost |
| Convenient | Professional precision |
| Can be done at home | Customized to your hair |
| Greater risk of mistakes | Better control over blending |
| Good for small changes | Better for major transformations |
| Requires patience | Faster and more predictable |
DIY is most suitable when you’re comfortable making gradual changes and accepting some natural variation.
DIY Wolf Cut Videos: Wolf Haircut
You may find DIY wolf Haircut searches and wolf Haircut DIY videos when looking for haircut inspiration. Treat any video as a guide, not a guarantee: hair length, density, and texture can change the result. Searches such as DIY wolf cut long hair usually point to long-hair versions, so pay close attention to how much hair the creator removes from the crown and back.
TikTok clips can also make a DIY wolf cut TikTok method look easier than it is because they often skip the sectioning and checking steps. Before following a quick trend, make sure you understand the full process and have the right scissors. A simple wolf cut easy tutorial DIY should explain the sections, the crown guide, and how to preserve the back length.
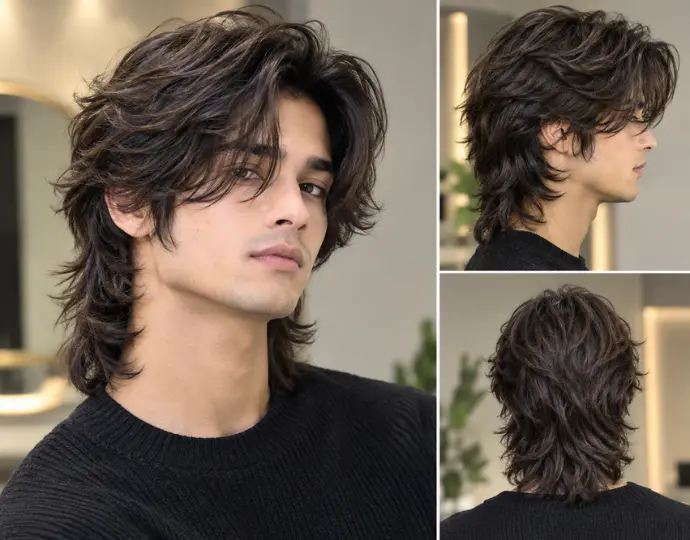
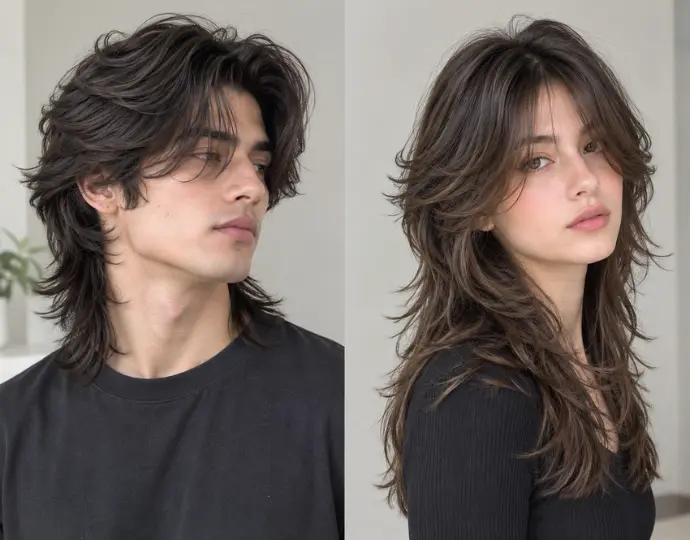
Can You DIY a Wolf Cut for Men?
Yes. A DIY wolf cut men style or DIY wolf cut man haircut uses the same basic idea: shorter texture around the crown with more length at the back. The best shape depends on the starting length and hair texture. If you want a very short or sharply blended version, a barber can usually create a cleaner result.
Related Article: 55+ Best Wolf Cut for Men in 2026: Guide and Styling Tips
Frequently Asked Questions
Can I cut a wolf cut at home?
Yes. A wolf cut can be created at home if you use proper sectioning, make conservative cuts, and preserve enough length for adjustment.
Is a DIY wolf cut easy?
It can be relatively simple for a soft version, but a dramatic wolf cut requires more control because the crown, sides, and back need to transition properly.
What length is best for a wolf cut?
Medium to long hair provides the most flexibility, but short hair can also be shaped into a shorter wolf-cut variation.
Should I cut a wolf cut wet or dry?
It depends on your hair type and experience. Straight hair can be easier to evaluate when dry, while wavy and curly hair require careful consideration of shrinkage and natural texture.
How should I section my hair for a wolf cut?
Separate the crown, sides, back, and nape into controlled sections. Keeping the sections organized helps prevent accidentally cutting the longer back.
How short should the crown be?
There is no single correct length. A longer crown creates a softer wolf cut, while a shorter crown produces a more dramatic shape.
Can I do a wolf cut on long hair?
Yes. Long hair is especially suitable because you can create shorter crown layers while preserving significant length through the back.
Can I do a wolf cut on curly hair?
Yes, but curly hair requires additional care because shrinkage and curl patterns can make the final length difficult to predict.
Can I do a wolf cut on thin hair?
Yes. A softer wolf cut can work well with fine hair, but avoid aggressive thinning that could make the ends look sparse.
Can I do a wolf cut on thick hair?
Yes. Thick hair can provide excellent volume, but bulk should be removed carefully rather than excessively thinning the entire haircut.
Can I have a wolf cut without bangs?
Absolutely. Long face-framing layers can create a wolf cut without a traditional fringe.
How do I fix a bad DIY wolf cut?
Stop cutting and assess the shape after styling. If the crown is too short, the layers are severely uneven, or the transition is disconnected, a professional stylist may be able to correct the shape.
How long does a wolf cut last?
The shape gradually changes as the hair grows. Many people refresh the haircut every 5–8 weeks, depending on their desired level of definition.
Is a wolf cut the same as a mullet?
No. They share some characteristics, but a wolf cut generally has more layered, blended movement between the crown, sides, and longer back.
Final Thoughts
A DIY wolf cut is achievable when you approach it as a controlled layering process rather than a one-cut transformation.
Start by deciding how dramatic you want the style to be. Section the hair carefully, establish the crown guide, preserve the back length, create face-framing layers, and add texture gradually.
Most importantly, cut less rather than more.
If you’re unsure about a section, leave it longer and reassess after styling. A few extra minutes of checking can save you weeks of growing out an overly short layer.
For more inspiration and detailed hairstyle guides, explore our Wolf Haircut Guide, Long Wolf Cut Ideas, Short Wolf Cut Styles, Curly Wolf Haircut, Korean Wolf Cut, Men’s Wolf Haircut, Layered Wolf Cut, and Wolf Cut With Bangs guides.